Install
- install by File/User Preferences.../Addons/Install from File/
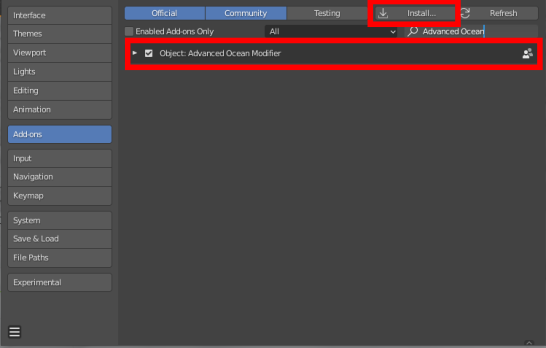
Install Add-on from File and check the checkbox.
Generate Ocean Button
- Creates an ocean
- Sets initial ocean values
- Key frames ocean animation to the right timing and extrapolates
- Preinstalled Dynamic Paint Canvases for object foam and interaction with objects
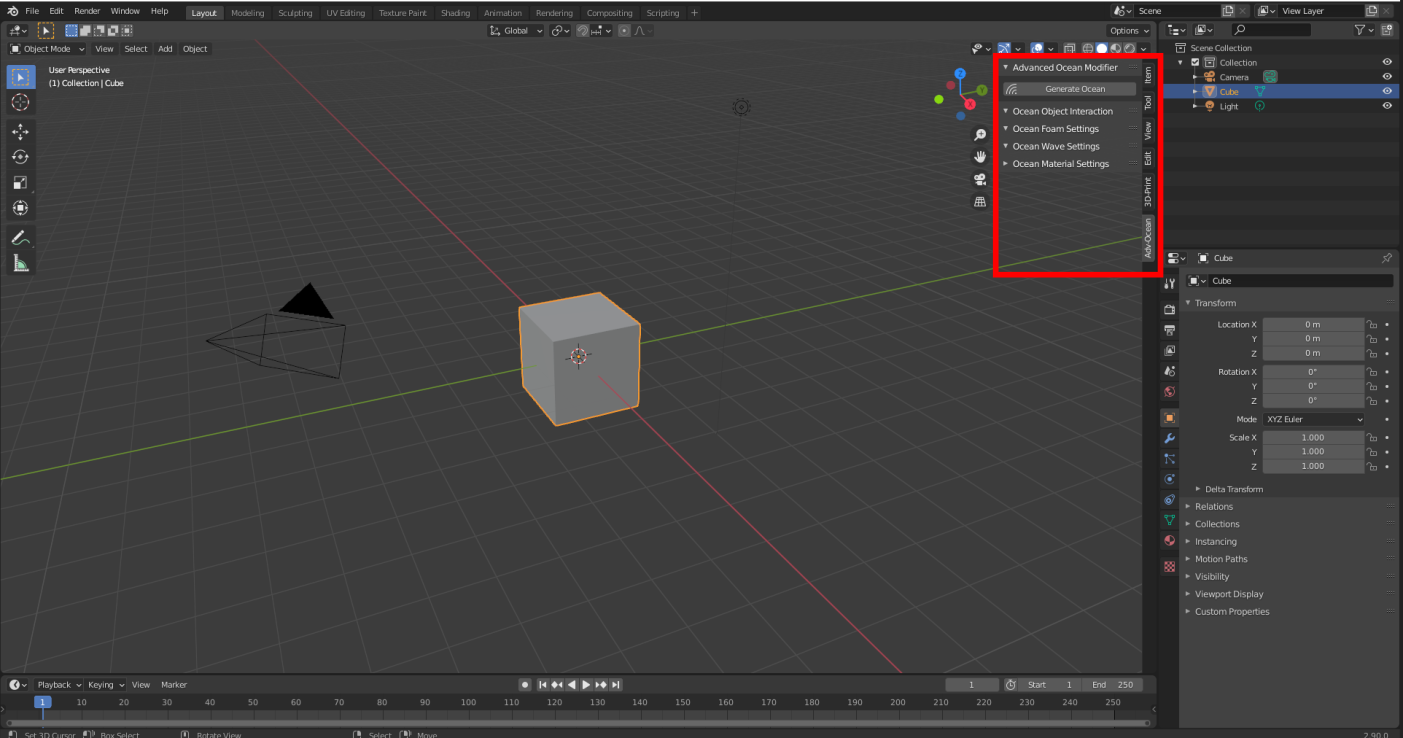
On startup the Addon asks you to generated an Advanced Ocean.
After generating the Ocean more Options become available.
- Corrects some not ideal default values of the (for example reduces the "wind velocity value" that deserves another name).
- Keyframs the time option in ocean modifier and extrapolates for unlimited ocean fun.
- Adds the "AdvOcean"-Material
- Adds the first 2 dynamic paint canvases (Properties/Physics Panel) to create object foam and object waves.
- Object foam: the canvas "Wetmap" records floating and moving of objects which will define the foam created by objects.
- Object waves: the object-ocean-interaction is accomplished by a canvas called „Waves“ which records the movement of objects and translates them into wave pattern which deform the ocean.
- Presets groups for the brushes: 1. "Paint" group for canvas "Wetmap" and 2. Waves
- Renames the Ocean "AdvOcean"
Please don't rename the Ocean. Otherwise the add-on will not find the Ocean and only allows generating a new one. Only one AdvOcean is allowed (Please complain if you think there is a mayor feature missing).
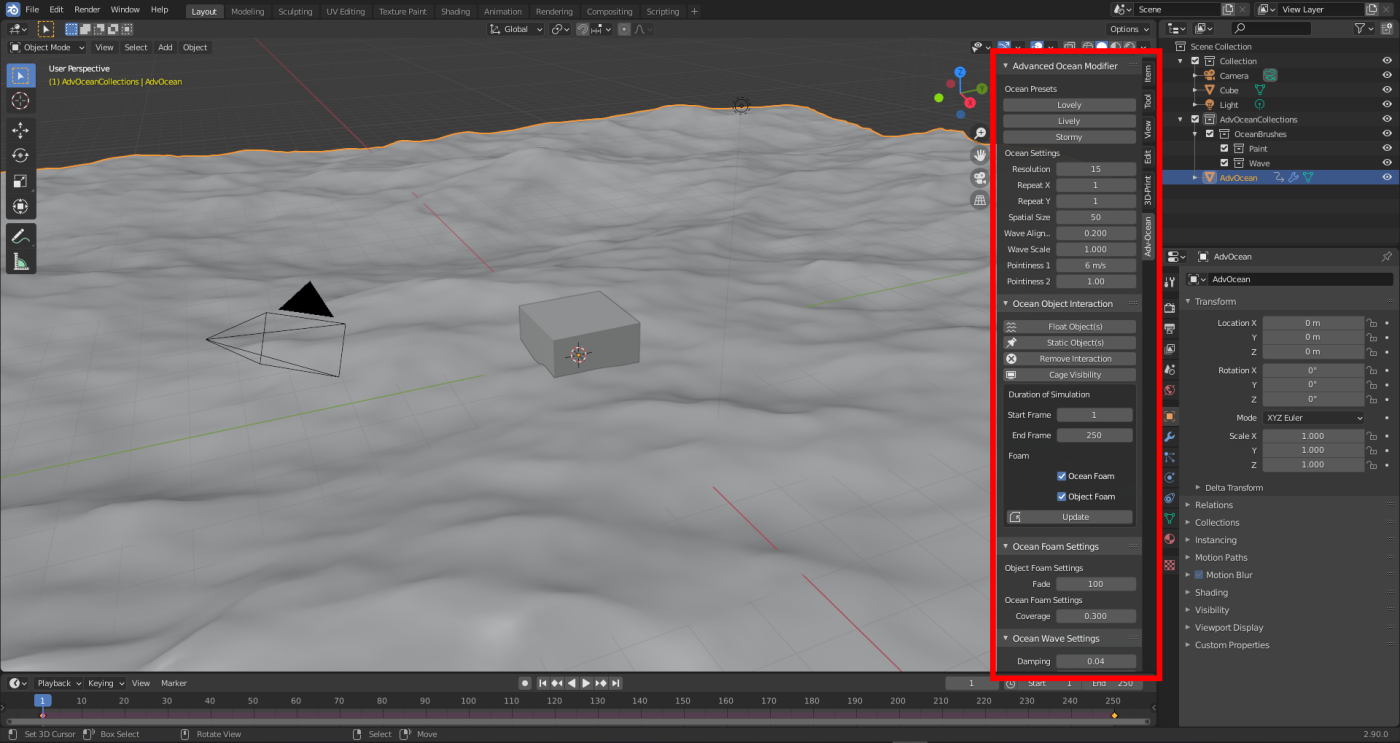
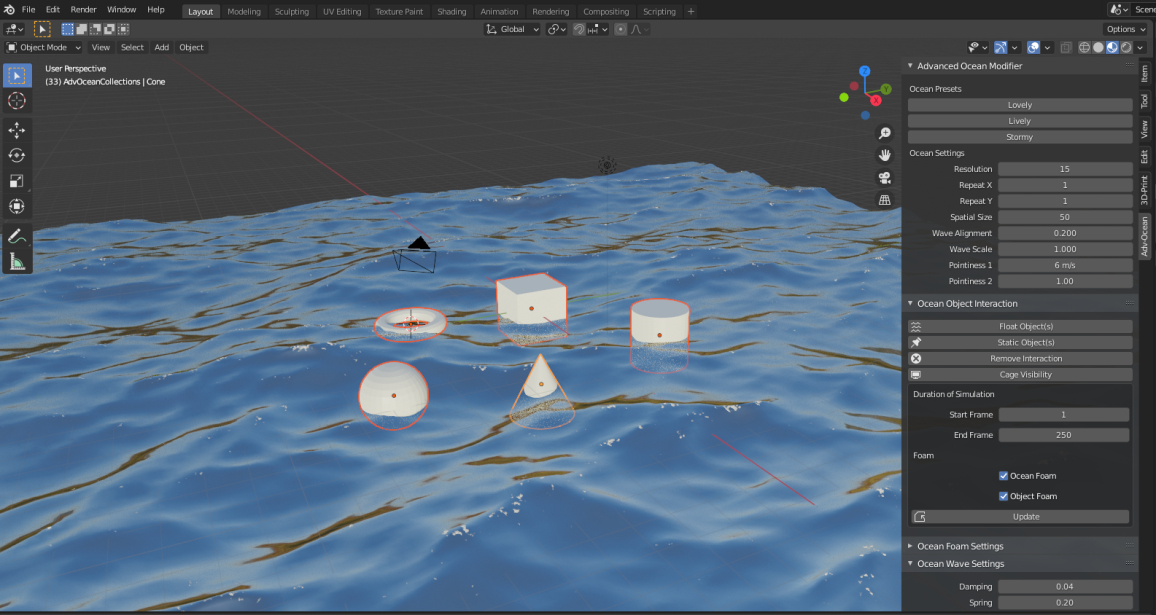
Option Overview

- Ocean Presets: 3 Presets for different weather conditions.
- Ocean Resolution: Direct access to ocean modifier resolution option.
- Repeat X and Y: Increase the ocean surface area.
- Spatial Size: How big is the ocean patch in real life (m)
- Wave Alignment: amount of waves moving into the same direction (wave front formation)
- Wave scale: define the wave height.
- Pointiness 1 and 2: both values are supposed to help getting rid of ugly deformations on the top of strong waves
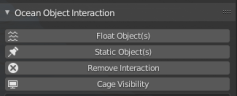
- Float Object(s): Makes one or several selected objects float on the ocean as well as creating waves and foam.
- Static Object(s): Makes an Object generate waves and foam
- Remove Interaction: Removes all interactions of an object with the Ocean
- Cage Visibility: switches the 3d viewport visibility of the Float-Animation-Cages on/off
- Duration: sets the start and end frame of the ocean simulation in the ocean modifier and all dynamic paint canvases after clicking update
- Foam checkboxes: switches Ocean Foam and Object Foam on/off after hitting update
- Object Foam Fade: Time object foam needs to dissolve. (Translates into length of a foam trail behind a boat)
- Ocean Foam Coverage: Percentage of Ocean covered with foam.
- Damping: increase to make the ocean resists object waves more
- Spring: increase to make the object waves more springy
- Smoothness: controll how smooth object waves are interpolated
- Ocean Material: Generates a complex ocean material on the selected object.
- Color of the Water, set the base color of the water (white means untinted reflections)
- Rougness of the water, increase to make water look less shiny
- Transparency of the watermaterial, increase to make water more transparent
- IOR (index of refraction) of the water
- Color of the foam
- Roughness of the foam, increase to make less shiny
- Color of the foam
- Transmission of the foam, principled shaders translucency
- Patchiness: increase to have more foam patches instead of larger conected parts
- Bubblesize: increase to scale down the size of the bubbles
- Bubble Noise Threshold: controll the transistion of bubble pattern to noise to water on the edges of foam patch
- Bump Strength: Bump strength of the foeam, increase to have foam appear more elevated from the water surface (use in eevee)
- Displacement: Bump strength of the foeam, increase to have foam appear more elevated from the water surface (has only an effect in cycles, mixing with bump may cause problems )
Presets
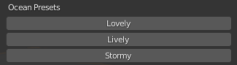
- Each button sets different weather presets to the AdvOcean.
- Lovely
- Lively
- Stormy
Ocean Settings
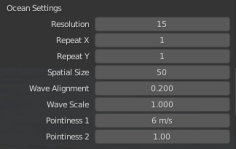
- Quick accesses to most important ocean settings
- Resolution
- Repeat X and Y
- Wave scale
- Wave alignment
Resolution option
- Sets the resolution option in the ocean modifier.
The resolution is the most important value regarding the quality of the ocean simulation. A low value (for example 10) is good to set up a scene and work quickly (without the ocean eating your hardware). Higher Values (for example 25 - 28, > 30 often cause blender to crash) look wonderful but take a lot of the computer's resources. Moreover, the Resolution value has an influence on the wave height and structure. Higher Values seem to create less high waves. Therefore, some camera movements for example should be set in the range of the final resolution values for rendering and other things like setting up the scene with low resolution value. The Advanced Ocean Modifier allows quick access to this important value.
Repeat X and Y
Repeat X and y are two parameters from the Ocean Modifier, which allow multiplying the ocean surface in X and Y direction, respectively, in order to increase the size of the ocean. Additionally, scale the ocean or the objects to make the wave height and foam appearance fit your scene. In my opinion, the alternative scaling methods by "Spatial resolution" or "Scale factor" in the ocean modifier lead to not optimal results or the same result as XY Repeat and scaling.Wave Scale
Wave Scale allows changing the height of the waves. Although, the Ocean Presets initially adjust the wave scale corresponding to the chosen weather condition. However, adjusting the wave scale might be necessary while fine-tunning the ocean behavior.Wave Alignment
Wave alignment tweaks the orientation of wave formations. In other words, it changes the amount of waves moving in the same direction to form a wave frontOcean Material
- Applies a complex and adjustable Ocean material to the Ocean (or other selected Objects)
- Material consists of Water, Foam and Foam Factor
- Backup to reset the material
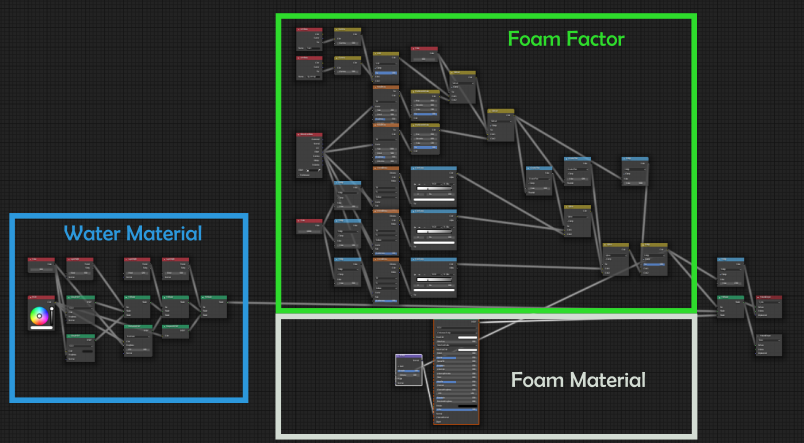
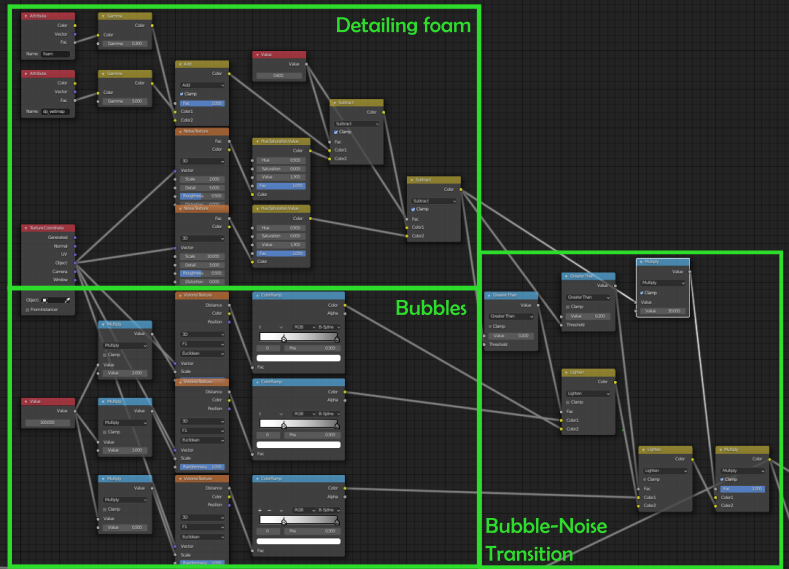
AdvMaterial Overview: 1. Ocean Material 2. Foam Material and 3. Foam Factor is fed into the final mix shader.
Water Material
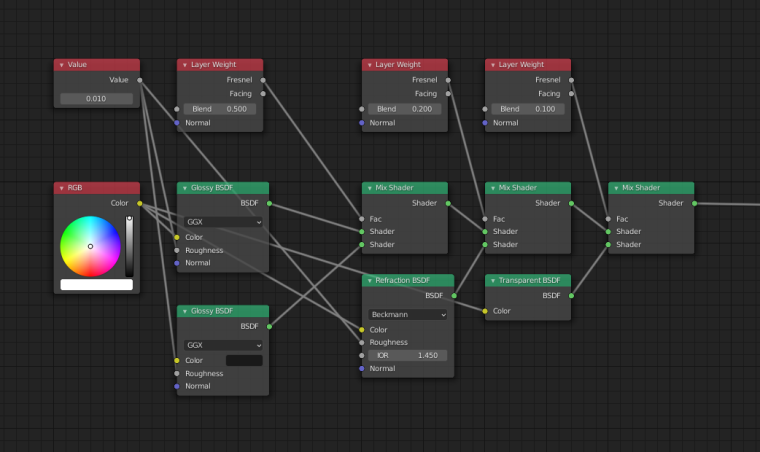
The Water Material consists of two glossy shaders combined with a reflection and a transparent node.
Foam Material
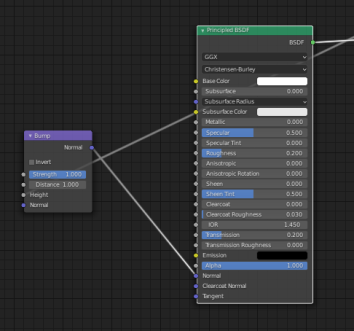
The Foam Material is essentially a glossy shader combined with an ambient occlusion node.
The foam material is produced by a principled shader.
Foam Factor
The Foam Factor controls where foam is visible in the final Cycles render.
The final mix shader before the material output mixes the water part of the material with the foam material. The mix of water and foam material is controlled by the complex structure in the factor input. It starts with the attribution nodes for object foam (uses "dp_wetmap" which is the result of the dynamic paint canvas) and foam created by the ocean (foam). Both can be adjusted individually by gamma nodes before they are added together. Because it is still very rough, the quality of the foam is improved by subtracting a rough and a fine noise texture. Additionally, a set of voronoi texture is used to produce a foam bubble pattern. This last RGBMix feeds the factor input of the final mix shader as well as the displacement input of the material output node via a math node set to multiply. The factor of this math node can be used to adjust the displacement amount, for example when the foam looks too bulky or too flat.
Interacting Objects
- Float Objects: makes objects float in the ocean, create waves and foam
- Static Objects: makes objects create waves and foam on contact with the ocean.
- Remove Interaction: removes all forms of interaction with the ocean.
- Cage Visibility: switches Float-Animation-Cage visibility in the 3D-Viewport.
Float Object(s)
- Add a Float-Animation-Cage which extract average normal (Dynamic Paint)
- Add copy rotation/location from cage
- Makes object create foam
Select one or several objects and click "Float Object(s)".
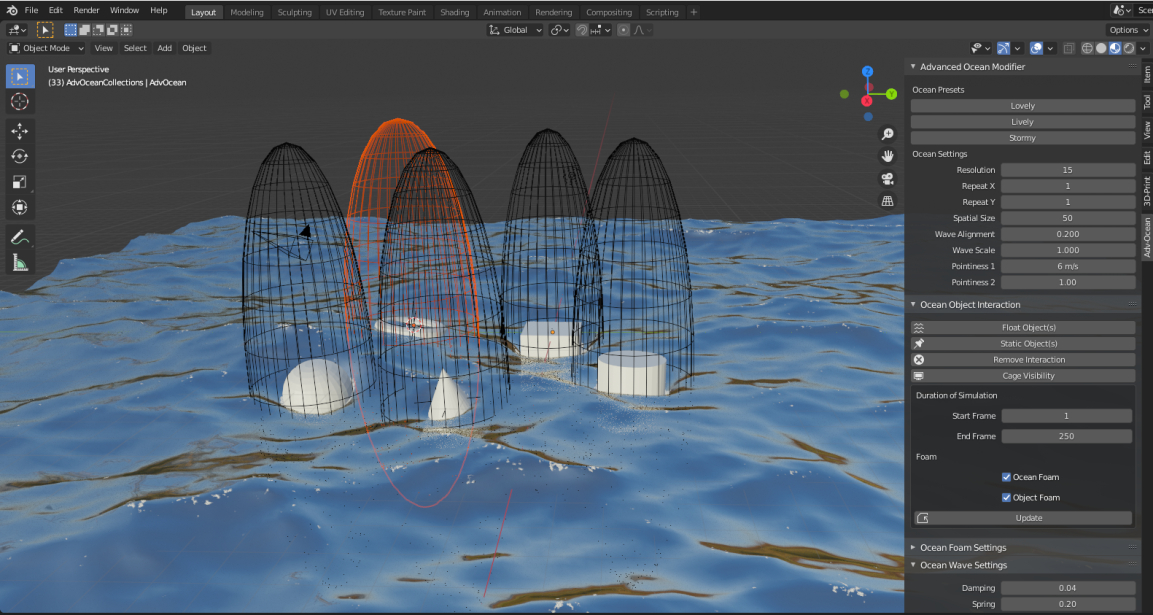
After applying each object is surrounded by a Float-Animation-Cage.
Making things float was never easier. Select one or as much Objects you like to make float. Click the float selected button und and everything is setup. Start animation to see them floating on the Ocean. An Empty will be set at the origin of the object and will be used as tracking point for the ocean movement. The object it self can be positioned you want, but it will alwys inherent the movement of the empty. The add-on creates a Float-Animation-Cage. They are named according to the structure "Objectname".flaotAnimCage and are visible in the viewport but not the render by default (see "Cage Visibility"). This cage reads out the average normal (vector perpendicular to the surface) and gives it to the object by two constraint (copy rotation, copy location). Because the normal is an average of the area included by the cage, the size of the cage matters for the simulation: small cages result in stronger movements of the object and large cages create smaller movement. So when a large heavy yacht moves like a boat made of paper, the size of the cage is not big enough. A good rule of thumb is to give the object some space to move in the cage. Blender objects might get claustrophobic. Be careful when working with big waves. The cages should always penetrate the ocean. Under stormy conditions a big wave may be larger or lower than the cage. Just increase the size in z-direction. The float cage draws on object's "own" canvas (Weightmap) of the AdvOcean. However, it will not create foam or waves. On the other side the object generates Waves and Foam by drawing as dynamic brush on the Wetmap and the Waves canvas via the groups Paint and Waves.
Only object types which accept Dynamic Paint Modifier can float!!! This limits the options at the moment to mesh objects.
Animate Floating Objects
When changes are done in the ocean modifier (for example change the resolution) the objects tend to jump to the center of the grid floor. Play the animation to reset their position inside the float cages.
Static Object(s)
- makes objects generate waves and foam under contact with the Advanced Ocean
- Use for objects that are not supposed to float but should interact with the ocean
- Ignores all selected objects that cannot interact.
Select one or several objects and click "Static Objects" to have objects create foam and waves, but shell not float. This option can be used for static objects that touch the water, for example landing stages or oil platforms. It can also be used for animated objects that touches the oceanl for example a landing bird. The button generates dynamic paint brushes and groups (Paint, Waves) to draw on the ocean. In contrast to floating objects, this button will not apply any constraints to the object.
Remove Interaction
- Removes the interaction (float and static) from selected Object(s)
- Ignores everything that has no interaction
Sometime you wane remove the interaction with the Ocean again. Simply click on the Object or select several objects and press "Remove Inteaction". It removes the Dynamic paint options, (when floating) the constraints and the float cage. In contrast, this option ignores everything that is not interacting for example the AdvOcean and the float-animation-cages. Only selecting the floating cage and press the Remove Interaction button will not remove the interaction from the floating object.
Visibility of the Float Cage
Duration
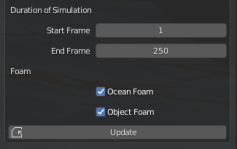
- Set the start and end frames in Ocean Modifier and all Canvases
- Press update to set values
A nasty thing while working with Oceans is to control the duration of the simulation. When you have 20 Objects floating on the ocean it's not fun to change start and end frame in all dynamic paint canvases. Therefore, the Advanced Ocean Modifier allows setting the duration of the animation. Set the values for end and start frame and press update. It will only change the start and end frame values in the dynamic paint canvases and the ocean modifier.
Foam Check Boxes
- Object Foam on/off (shut on/off dynamic paint canvas "wetmap")
- Ocean Foam on/off
- Press update to set the values
You can always shut the Ocean foam and the object foam on or off with the check boxes. They will switch the according foam option in the ocean modifier (ocean foam) or wetmap visibility in the dynamic paint options (object foam). Set as wished and press the update button.
Foam Settings
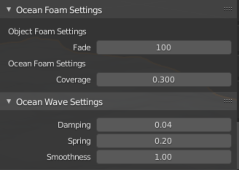
- Object Foam Fade: time object foam takes to dissolve.
- Ocean Foam Coverage: Part of ocean covered with foam
Object Foam Fade
The foam created objects needs to be changed according to the scene. Quietly floating objects may only need a slight amount of foam to blend with the ocean (use values 100). In contrast, a fast moving motorboat leaves a trail of foam behind. In the first case use values smaller 100. The motor boat needs values of around 500.
Ocean Foam Coverage
Foam coverage defines how much of the ocean surface is covered with foam. This values is initially set by the ocean presets and normally don't need to be touched. However, in some cases it can make sense to tweak this value together with the material nodes (gamma of foam attribute, factor of noise subtracting math nodes).
Problems of other users
Foam is not in Render although visible in the Viewport
Check whether your file is saved to harddisk. When it's not saved, blender can'T store the necessary cache files. You may also check that you are useing the newst AOM version.
Additional Useful Blender Values
Spread speed of the wetmap
The spread speed in "Properties/Dynamic Paint/Wetmap/Dynamic Paint Effects/spread speed" define how fast foam drift´s away from the object. Too high values make an object appear to lie in a puddle of foam or it bleeds foam. Too low values object foam may not be visible. The initial value of 0.3 (together with the foam fade option) suits most cases and spread speed doesn't need to be touched.
Dynamic Paint Waves Factor
Probably some objects need to create more waves than other. The amount of waves created can be controlled for each individual object under "Properties/Dynamic Paint/Dynamic Paint Waves/Factor". A higher value makes the object create more waves and smaller values less.
Initial Wave Effect
After setting up an ocean scene with interacting objects, the user might be shocked by the first frames, because the ocean might be drastically deformed around the object. This will go away after a few frames. This is not the effect of the add-on, but is a blender issue.